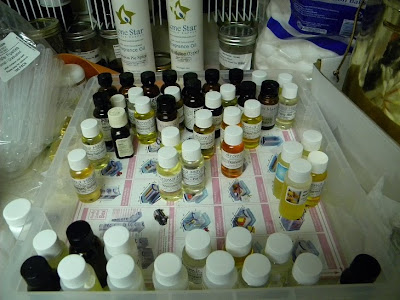
I have been collecting a lot of little fragrance testers lately. When I see a sale for a company that I like to order from, my credit card shudders a little. I decided that before I buy any more fragrances, I need to try those I already have. Here are just a few of the things I needed to test. In reality, there are waaaaaaay more than this.
Key Questions:
1: Does the FO accelerate, rice or seize?
2: Does the FO discolor?
3: Does it morph?
4: Does it fade?
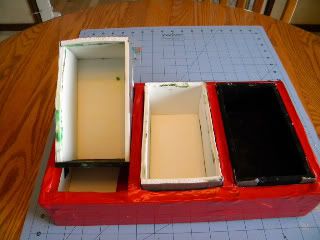
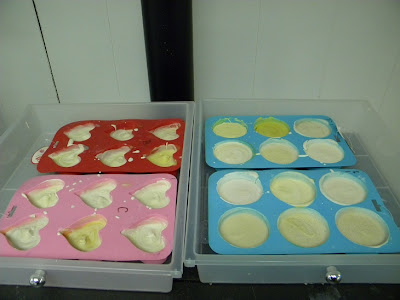
This is where silicone molds come in very handy. I have 2 round "puck", 4 heart, and a few other shapes just taking up space. I decided that 2 oz tester bars would answer the key questions without sacrificing too much soap batter.
I also wanted to test out the new
Vanilla Stabilizer from
Nature's Garden Candle Supply on a couple of FO's that I know for a fact discolor DARK:
The Scent Works' Pink Sugar and The Scent Works Vaniglia de Madagascar and a new FO that I'm sure WILL discolor, Nature's Garden Vanilla Extract. The Vanilla White Stabilizer usage rate is .3% of the total batch (water, lye and oils).
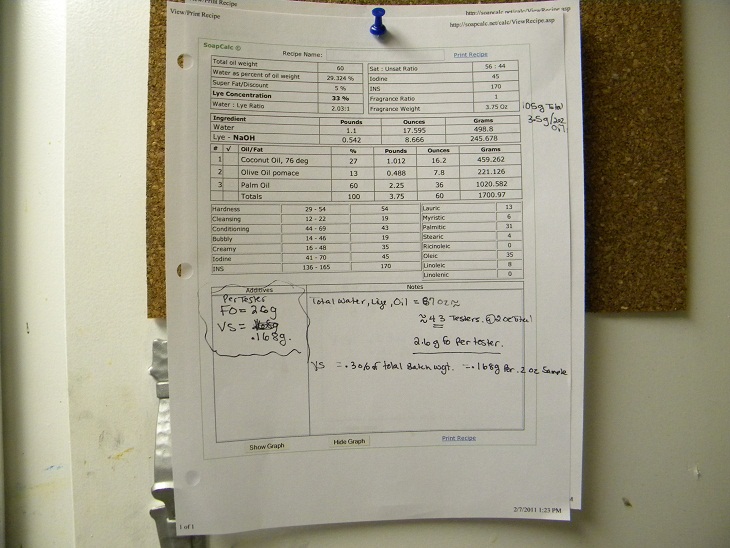
Here's the math:
40 fragrances
2 oz testers, (approx 56-60 grams each)
80 total oz of soap (lye + water+oils)
Vanilla Stabilizer = .003 * 2 oz or .003 * 60 grams = .18 grams VS (thank goodness I have the tiny gram scale from TKB-Trading!)
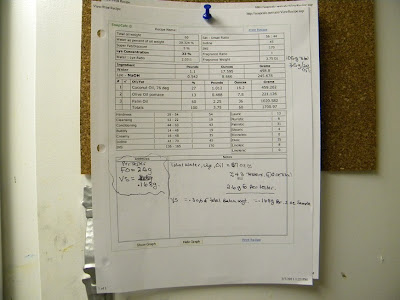
I figured a 60 oz batch using a 33% lye solution would do the trick. Rather than waste precious cocoa and shea, I stuck to the trinity: Coconut, palm and Olive. SF was 5%.
FO at approximately 1 oz PPO = 2.5 grams per 2 oz tester.
I used the thermal transfer method to help ensure a long working time. No colors to worry about, but lots of FO's to measure.
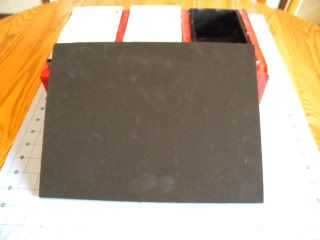
Here's a photo of the aftermath:
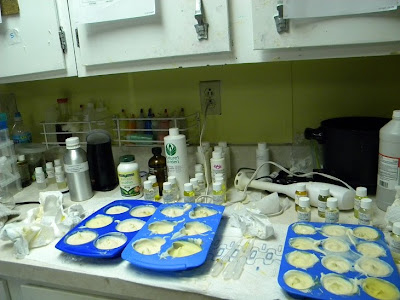 The process:
LABEL YOUR TRAYS!!!
I used letters in the top left corner to orient myself in case the tray got turned. Good thing too, because they DID get turned.
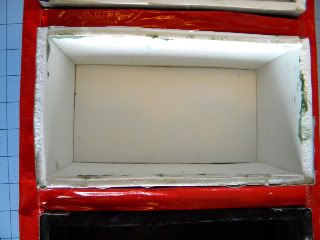
Pour the 6 cavities in the first mold with approximately 2 oz of batter. The first 3 FO's were to try the vanilla white, so I pre mixed the VW with the FO's then one by one poured the FO mixture into the mold stirring briskly with a chopstick until it looked blended. Rinse, repeat for each one. I kept the bottles of FO lined up in order of where they were poured so that I could take notes later.
Repeat for tray #2. Instead of pre-weighing the partial grams of FO, I used a graduated pipette to dispense the fragrance into the muffin cups.
Lecithin Test:
One FO started to rice. I stirred as best I could then reached for the lecithin. I used a 400 IU caplet for the FO in a mixing cup. It was probably too much lecithin, but I was in a hurry. The second pour of the FO was much smoother. Mental note.
Repeat for trays 3, 4, and 5. By this time the soap batter was getting thick. I added some water to the batter to thin it a bit but I couldn't expect miracles! Tray #6 was a tiny muffin tray, so 1 oz testers...
I remembered to write down the FO's in each tray by the positions and have to make little tags to keep with the soaps once they come out of the molds.
4 trays are sitting on the pellet stove in hopes of coming to gel. The rest will have to sit for a few days before they can come out of the molds. I suppose I could stick them all in a low oven to gel, but that requires me to trek up/down stairs several times.
I will post after photos of them so you can see if the VW does its job or not. I'm a little hopeful, but at the same time worried that it will morph the scent.
Fragrances Tested:- TSW Pink Sugar with VS
- TSW Vaniglia de Madagascar with VS
- NG Vanilla Extract with VS
- Peaks Frankincense & Myrrh
- AH Vetiver
- NG Cucumber Melon
- Pear Pleasure
- Peak Bartlet Pear
- NG Nag Champa
- NG Sweet Pea
- AH Mint Julep
- AH Gap Heaven
- NG Cucumber Melon
- Amber Musk
- AH Gap Earth
- AH White Tea
- AH Cotton Blossom
- AH Amber Romance
- AH Almost Paradise
- AH Amazing Grace
- AH Dreamcatcher
- CC Victorian Rose
- AH Childs Room
- AH Barbershop 1920s
- NG French lavender
- AH Aqua
- AH Pineapple
- AH White Tea & Ginger
- NG Fresh Raspberry
- NG Rice Petals and Shea
- NG Bamboo Hemp (with and without Lecithin)
- NG Mango Papaya
- AH Neroli
- AH Pomegranate & Oak
- AH Lemon Verbena
- AH Japanese Pear & Ginseng
- AH Falling Leaves
- AH Black Linen & Amber
- AH Blackberry Sage
- AH Interlude
- AH Oak Barrel Cider
- AH Badedas
- AH Black Raspberry Vanilla
- AH Celtic Moonspice
- TSW Creamy Coconut
- TSW Ginger Souffle
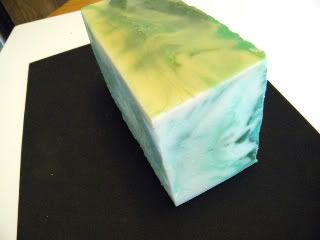
 Rewards come at a price though. It takes a lot of work and dedication to set up a shop and manage products. For instance, my main web site provides one catalog photo. Take a few photos. Pick the best and post it. Simple. Etsy provides up to 5 views of each listing. Soap isn't always the easiest thing to make appear artful, but I think I have found "my look". I chose 4 "views" of the same stack of soap. Choosing the best four bars from a batch is harder than you think. "Dressing" those bars to photo well is an art form unto itself
 I liked the glass marbles because they add a bit of shimmer and reflected light onto the subject soap.
 You can imagine how important it is to choose bars with little to no ash. I discovered the 91% alcohol spritz trick on the Dish Forum. I use it with great success on each and every batch to ensure a shiny top.
 Placing 4 bars at a slight angle like good little soldiers made me smile. Each face profile peeking out from behind the next shows a hint of the creaminess hidden within.
 I liked the birds eye view of the same bars.


 .
.